I got some requests for the Nuclear Wasteland workflow. As I said before, I used Canon EOS 7D with EF50mm f/1.4 USM and EF100mm f/2.8 Macro USM lenses on a Manfrotto tripod (055PROB), using Glidetrack with Manfrotto video head (503HD).
Camera settings were set on minimum (sharpness, contrast, saturation). That is how I achieved flat exposure.
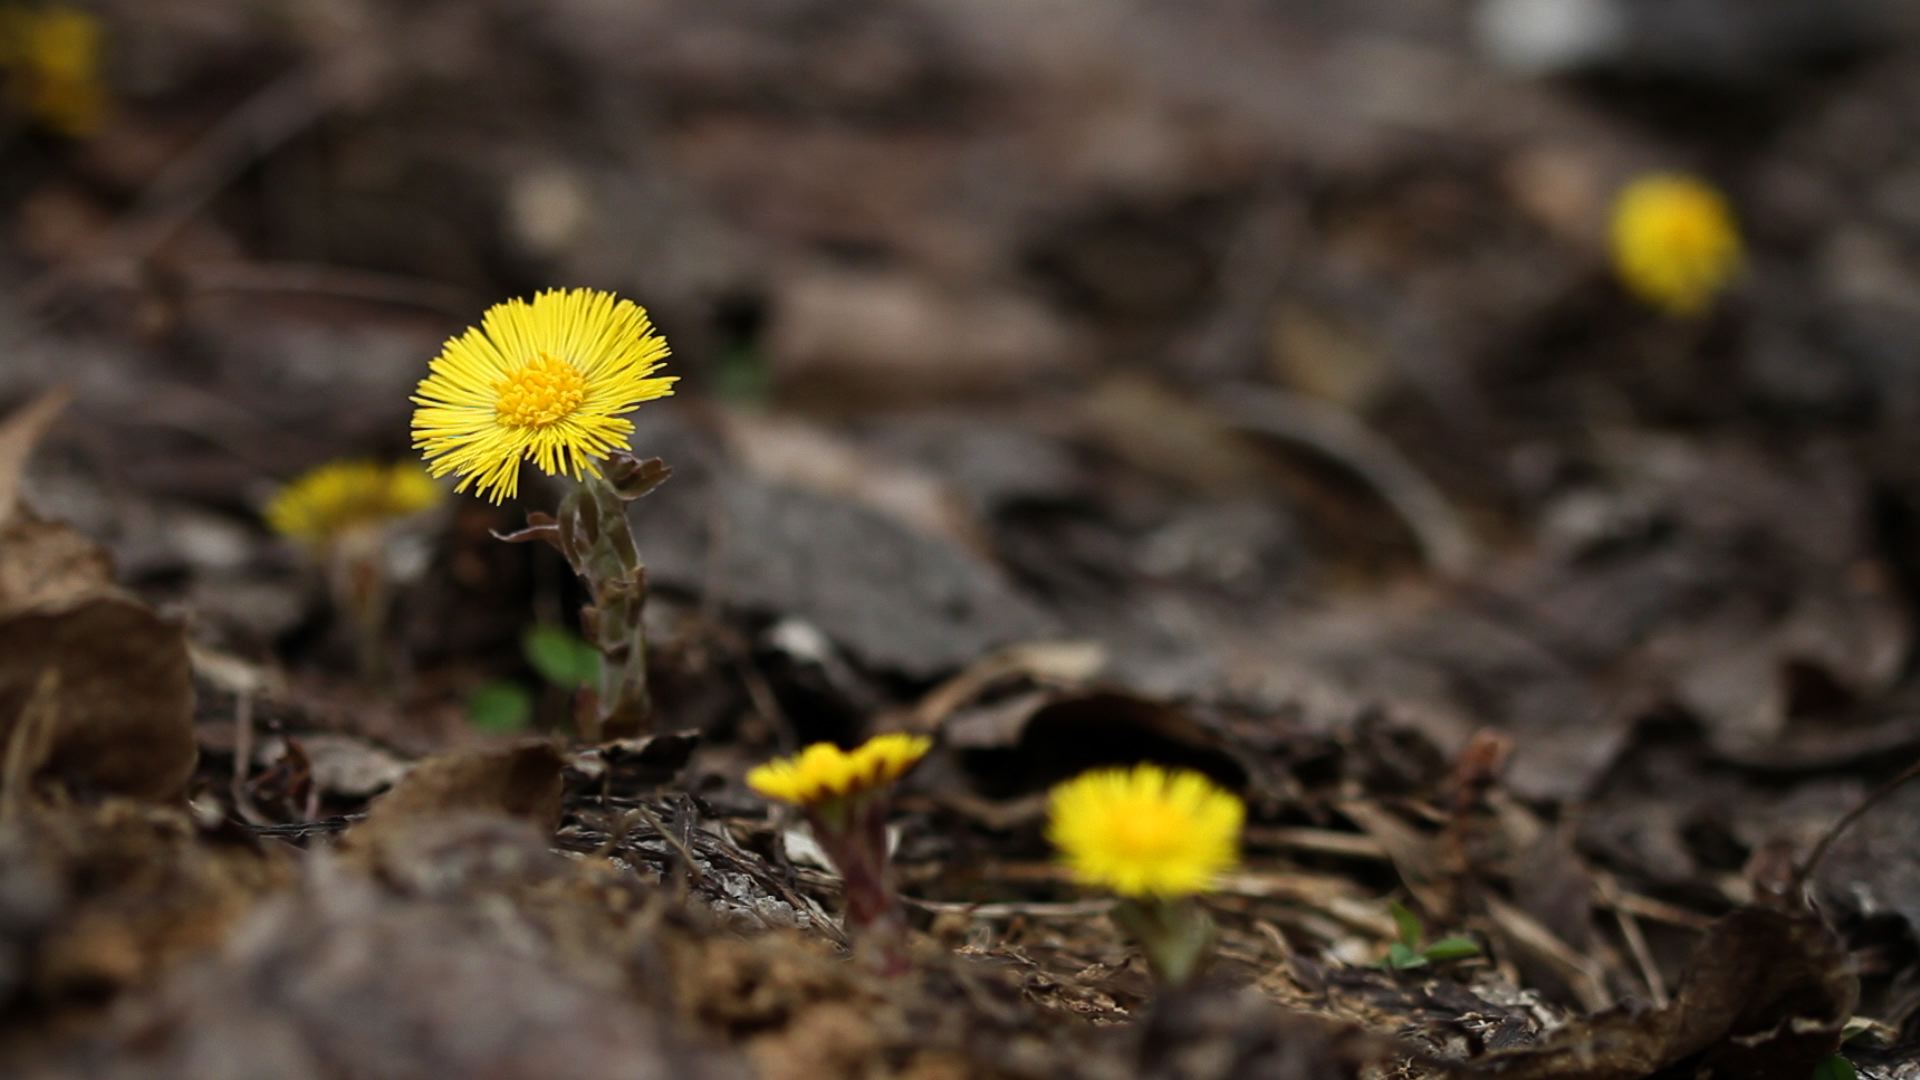
Unprocessed frame (click for full resolution)
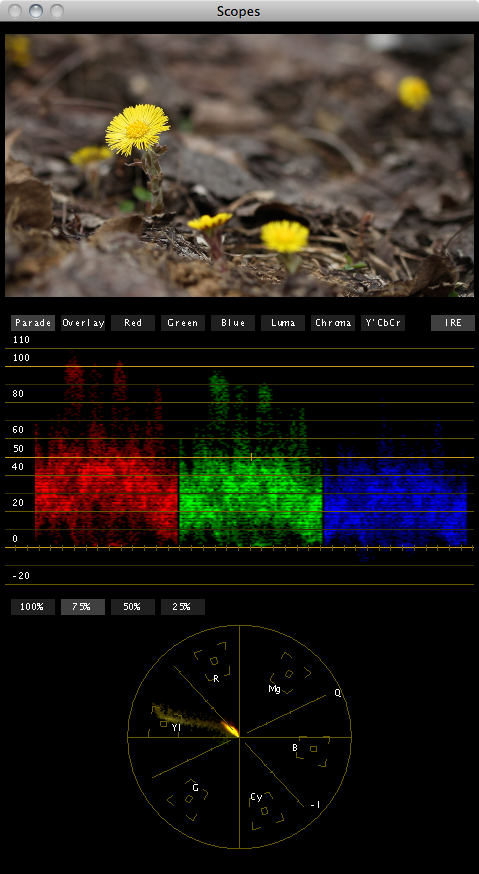
RGB Parade Scopes in Apple Color
I set the exposure low so I didn’t get any blown highlights. I had to be careful with the yellow flowers because I could easily blown only red channel. You can see on the scope above that red channel values are above 100 IRE.
I didn’t have ND filters then (later a bought Light Craft Workshop™ Fader ND filter) so I had to use shutter speeds higher that 1/50s together with wide open apertures (f/1.4 for 50mm and f/2.8 for Macro). Some shots have it set as high as 1/800s. I forgot to change the white balance from AWB (Auto) and I was kind of lucky because the tone values were practically the same and white balance didn’t change. ISO was set at 100. At that time I didn’t know anything about native ISO settings. 7D has native ISO settings 100, 200, 400, 800, and 1600. ISO’s 160, 320, 640, and 1250 are crushed versions of the higher ISO and have cleaner noise but have less dynamic range. Settings 125, 250, 500, 1000, and 2000 are boosted from the lower ISO’s and have increased noise so I try to avoid them.
All material was converted using MPEG Streamclip to Apple ProRes 422 (LT). It is easier to edit because h.264 is very processor intensive. After the edit was locked I didn’t replaced the ProRes footage for the h.264 one before color correction because conversion left values over 100 and under 0 IRE untouched.
I did color correction in Apple Color. Primary In: I equalized the values between clips, lowered the highlights and lifted the shadows to put them inside 0-100 IRE. I used Secondaries to desaturate any green foliage to preserve only yellow and brown color tones. I added slight vignette (Gamma 1.37, Blur 0.5) in Color FX. A also changed overall Gamma (Green 0.91, Blue 0.85) to cool the temperature of the predominately warm brown shots. The main correction was done in Primary Out tab. I lowered saturation to 0.9 and shadow saturation to 0.17 as I wanted blacks to stay black. I lowered the highlights not to lose the detail in the flowers due to over saturated yellow. I also played a bit with curves as you can see in lower image.
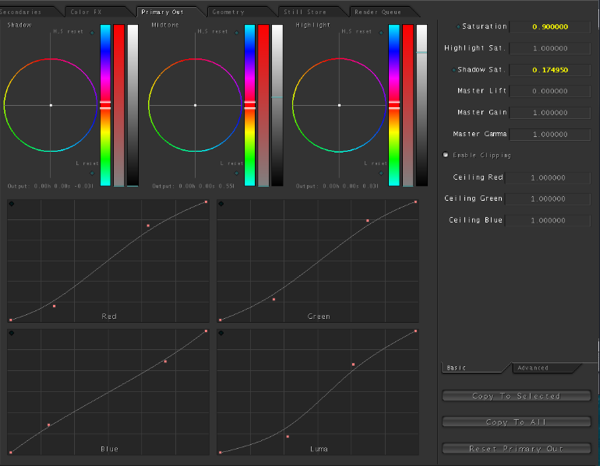
Primary Out color correction
I added the titles in Apple Shake. I used Stabilize node for tracking and Text node for the text. The second title has a shadow so you can still read the text when it is above the same colored flower. I controlled focus of the title with Defocus filter which is much more real looking as the Blur.
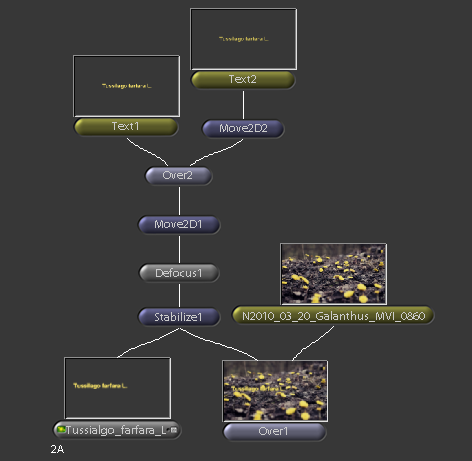
Shake node tree
I choose the music It Can’t Be from the GarageBand library. I exported the clip in ProRes 422 (LT) codec and transcoded it in Compressor with QuickTime H.264 setting to upload it to Vimeo.
This was the whole workflow. Now I invite you to watch the clip Nuclear Wasteland again.
Nuclear Wasteland from Peter Prevec on Vimeo.